

Chromium Developer Tools – Layers
July 11, 2022
Using Sticky Scroll in VS Code
September 6, 2022
Datadog tags are a great way to organize logs. It can be a little confusing to figure out how to add custom logs when using a built-in integration. Datadog has more than 500 built-in integrations across different systems, apps, and services. Using a built-in integration can save a lot of time setting up Datadog logs but at the cost of customization. I recently worked on making some custom Datadog tags on a built-in Auth0 connection. I will walk through the process of creating tags.
Step 1 Remapper
Under the logs tab on the left go to the configuration page.
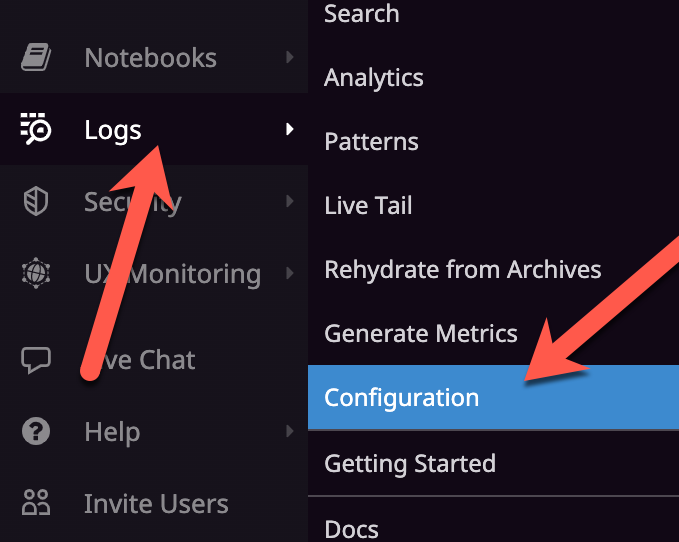
This will bring up a list of pipelines. Select the down arrow on the pipeline to add the tag to it.

This will bring up a list of all processors on the pipeline. At the end of the list select the “Add Processor” option.

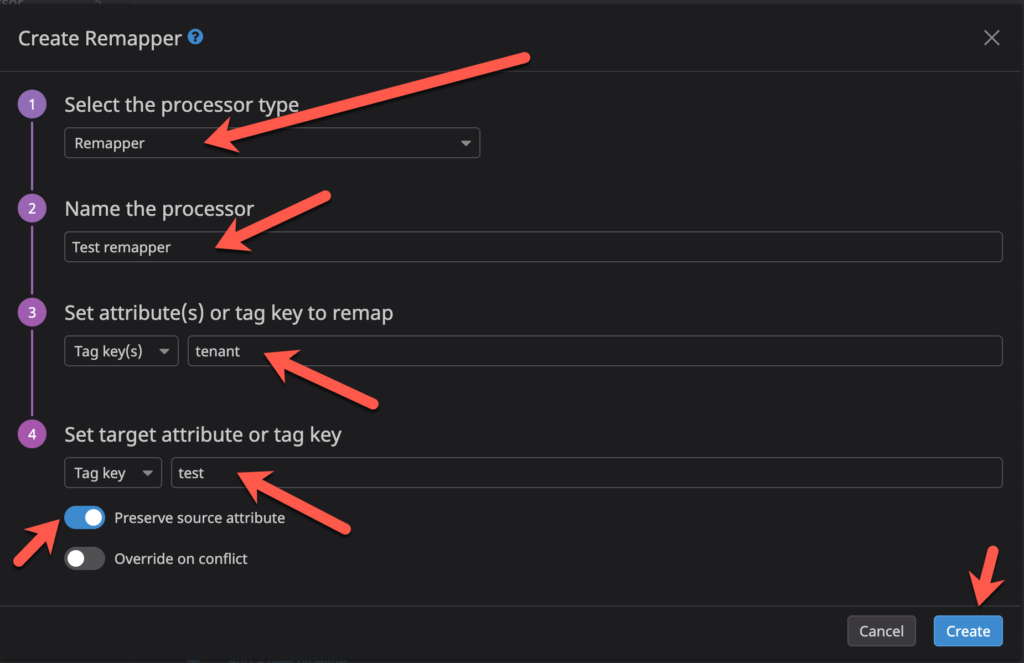
Select the “Remapper” and give it a name. Select “tag key(s)” and type in one of the default tag key. Next type in the desired tag key under “Set target attribute or tag key”. To keep the default tag leave “Preserve source attributes” on. Otherwise, unselect the “Preserve source attribute” switch.
Step 2 Category Processor
Now add a category processor to make the new values for the tag. Click the “Add Processor” again.

This time select the Category Processor and give it a name. For the “Set target category attribute” put in a value from above which in this case is “test”. Next add a “Populate category” for the “All events that match:” field. This value will be “test” with a colon and then whatever the original value from the tenant was. Then add the new value under the “Appear under the value name:” and hit add (repeat for more values).

Step 3 Remapper
The last step now is to now remap the new vales back to our new tag. This can be done by using another “Remapper”. Select “Add Processor” again.

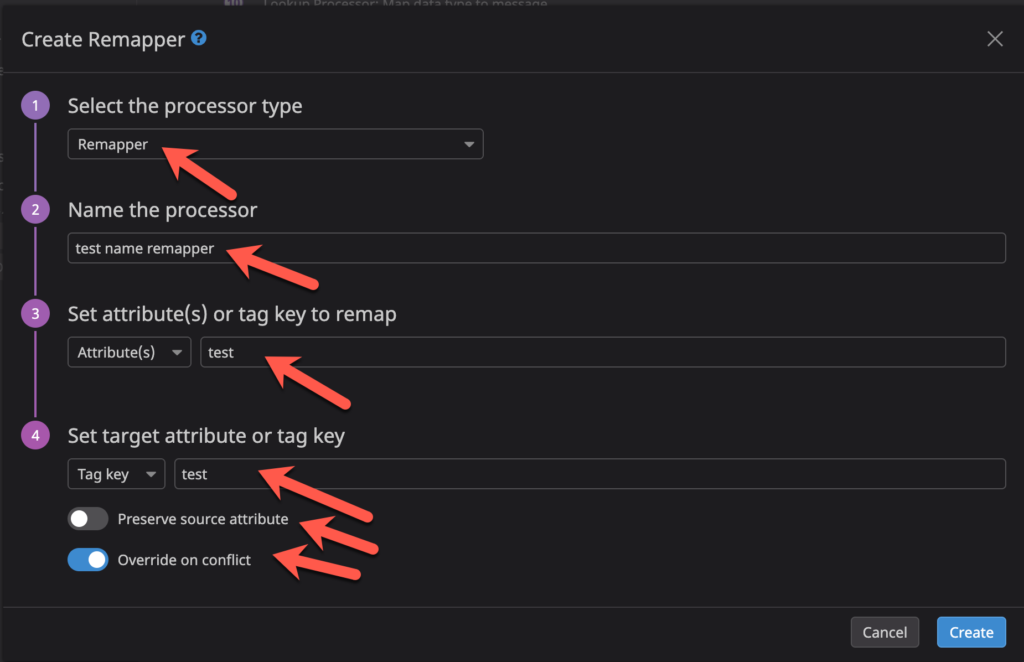
Select the “Remapper” again and give it a name. This time, change the “Set attribute(s) or tag key to remap” to “Attribute(s)” and put in the new key “test”. Next, under “Set target attribute or tag key” select “Tag key” and once again add the new tag “test”, and unselect “Preserve source attribute”. Finally on “override on conflict”.
Now when the next log comes through, it will have a new tag with the chosen value. I used this technique for to remap our tenant tags to environment tags. For log consistency between apps, I wanted to have the tenant name and also the environment name that matched the other environments. I was able to remap the tenant names to the environment names we wanted.

